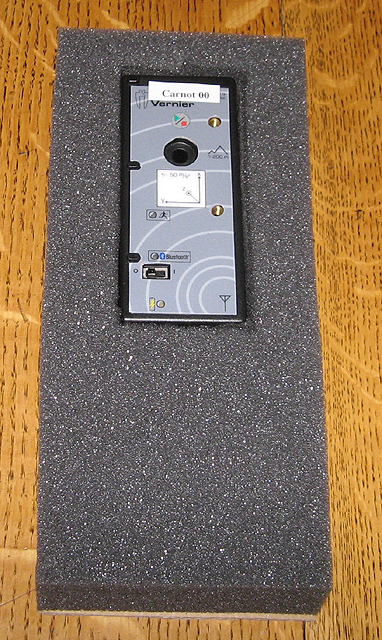
A Great Combination for the Amusement Park
To carry the WDSS unit in a DataVest, one needs to hold it so the Start/Stop button is readily accessible, and so the indicator LED is visible. The technique described below is relatively easy and yields a good result.Materials:
Foam - 1.5" x 10" x 4.5"
Cardboard - 4.5" x 10" and 2" x 5"
Carpet Tape (double-sided)Tools:
Sharp knife (wallpaper knife). Electric knife, Scissors, Straight edge
Preparation:
- Obtain foam that is the size you need or cut some to size.
- Mark the outline of where you will insert the WDSS unit. This size can be a bit smaller than the actual size of WDSS in order to hold it securely.
- Using the wallpaper knife and the electric knife, cut out the space for the WDSS. In addition, add a slit at the top into which the force probe mounting post can fit.
- Cut cardboard pieces to size. The cardboard does not need to be particularly stiff.
- Put two or more lines of carpet tape along the larger cardboard piece as shown in the photo on the next page.
Assembly:
Use:For instructions on use of the WDSS in the context of the amusement park, go to this url and download the document called Data Collection at the Amusement Park.
http://www2.vernier.com/booklets/data_park.pdfAppendix I will give you step-by-step instructions for using WDSS at the park.
Download this document as an MS Word file: WDSSandDataVest.doc
Download this document as a pdf file: WDSSandDataVest.pdf
September 2007